The best paver patios in Minnesota are built between May and October, but the planning should start right now. Before you break ground, late April through mid-May is the ideal window to evaluate your property, choose materials, finalize a design, and get on a contractor's schedule before the summer rush fills every crew in the Twin Cities metro. Homeowners who wait until June or July to start the conversation often find themselves pushed into September or October installations -- or worse, into the following year.
Before planning a spring paver patio near Lake Minnetonka, consider the site conditions, material choices, construction access, drainage, and realistic timing for the 2026 season.
Why Spring Is the Right Time to Plan (Not Build)
There is an important distinction between planning and building. Spring in Minnesota is for planning. The ground is still thawing, soil moisture levels are elevated from snowmelt, and conditions are generally too wet and unstable for proper base construction. That is actually a good thing for the planning process -- it gives you a clear picture of your property's drainage behavior before anyone starts excavating.
Right now, in late April, you can see where water pools after rain. You can see where the snow melted last and where the soil stays saturated longest. You can see where grading directs runoff -- toward your foundation, toward the neighbor's yard, or into low spots that turn into mud pits. All of this information is critical for designing a patio that performs for decades, and it is information that disappears once the soil dries out in June.
We use this spring evaluation window to design drainage solutions into the patio plan from the start, rather than retrofitting them after problems appear. For properties in Minnetonka, Shorewood, Wayzata, and other Lake Minnetonka communities, this is especially important because clay-heavy soils and high water tables are the norm, not the exception.
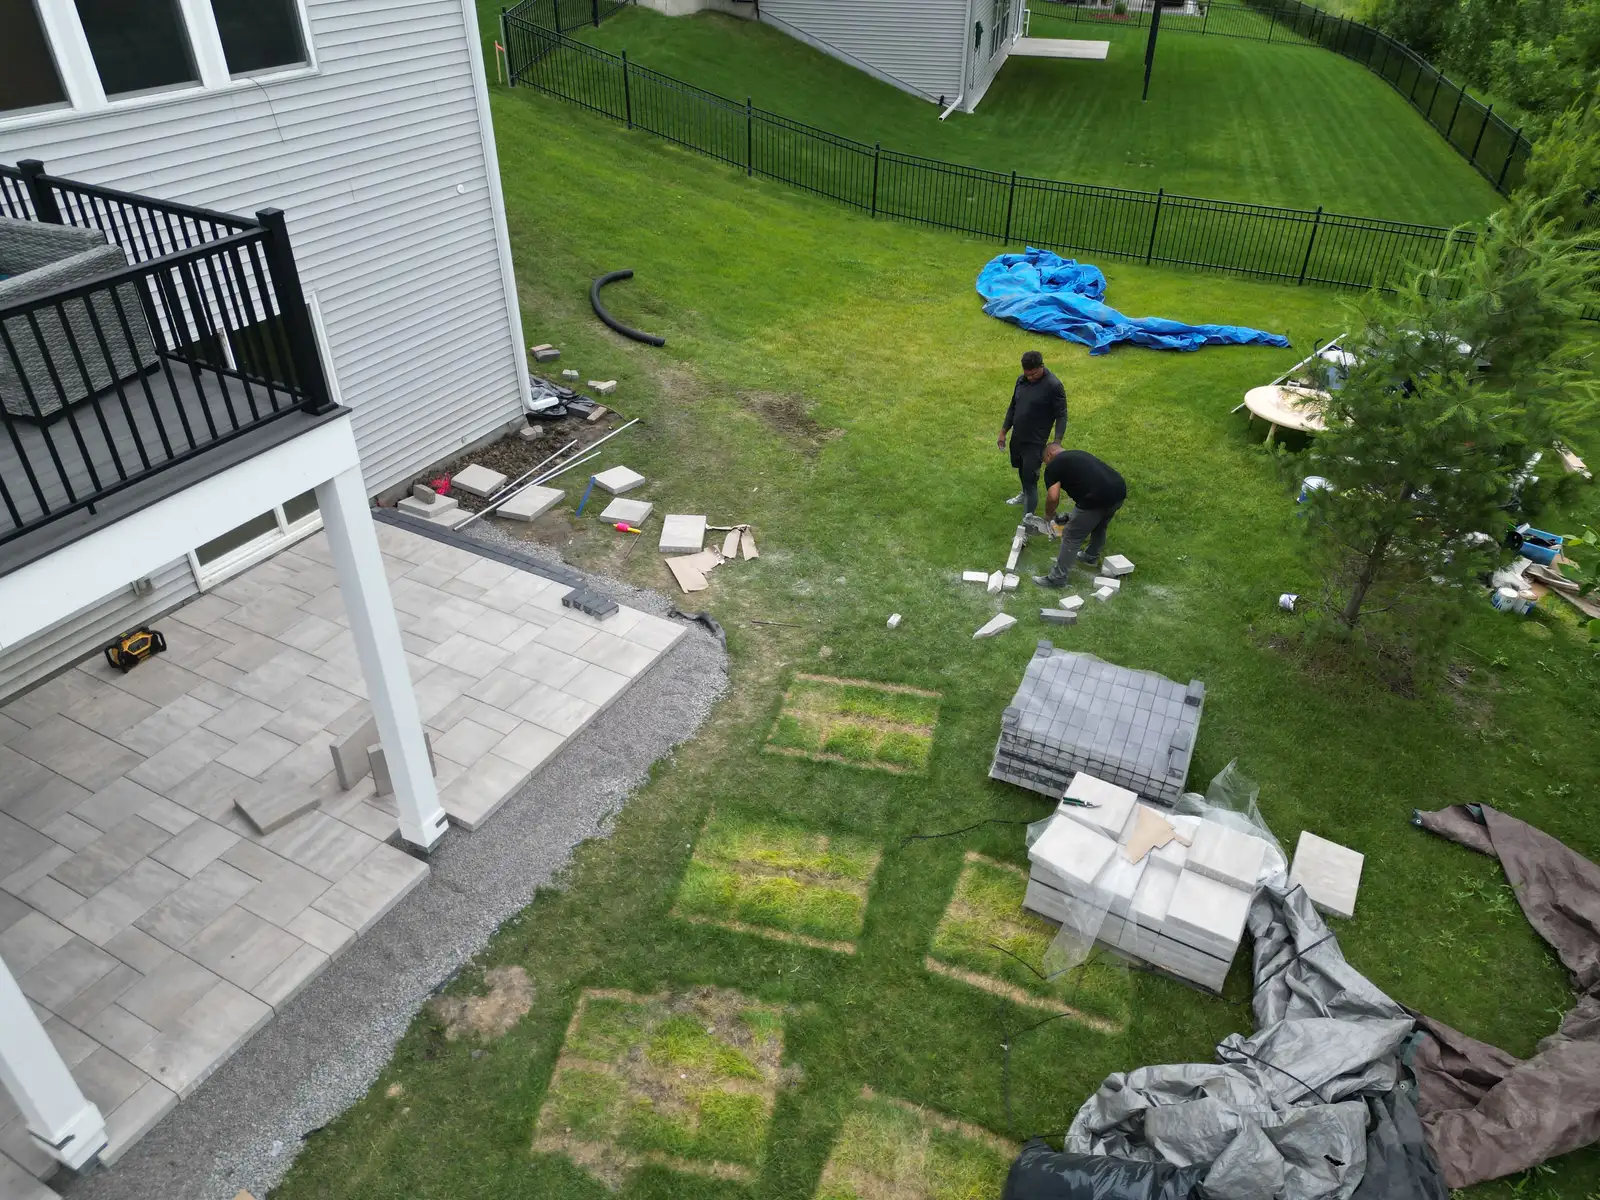
Step 1: Evaluate Your Site Conditions
Before selecting a single paver color or browsing patio layouts online, the first step is understanding what your property's soil and drainage conditions will require. This determines the scope, cost, and engineering approach for your project.
Soil Type
Most properties around Lake Minnetonka sit on clay-heavy glacial till. Clay soil expands when wet and contracts when dry, creating movement that can shift pavers and compromise base integrity. It also drains poorly, holding water against and beneath hardscape surfaces. The standard 6-8 inch compacted aggregate base that works on well-drained sandy soil is often insufficient here. Many of our Lake Minnetonka projects require 12-18 inches of open-graded base material to manage subsurface water effectively.
Drainage Patterns
Walk your property after a spring rain and note where water flows, where it collects, and how long it takes to absorb. If water pools near your proposed patio location, you will need a drainage solution integrated into the patio design -- not as an afterthought, but as a core component of the base system. French drains, drain tile, and grading corrections are far less expensive to install during patio construction than as a separate project afterward.
Grade and Slope
Every patio needs to slope away from your home's foundation at a minimum grade of 1% (roughly 1/8 inch per foot). If your yard slopes toward the house, the patio project will include grading corrections. If you are building on a slope -- common on lakefront properties in Deephaven, Tonka Bay, and Orono -- you may also need a retaining wall to create a level surface. Multi-level patios with steps and walls are some of the most striking outdoor spaces we build, but they require more engineering and a larger budget than flat-lot installations.
Access and Utilities
Heavy equipment -- skid steers, plate compactors, material delivery trucks -- needs to reach your backyard. Tight lots with narrow side yards, mature trees, or fences that limit access will affect the project timeline and cost. Underground utilities (gas, electric, irrigation, septic) must be located before excavation. Call 811 to mark utility lines, or we handle this as part of our site evaluation process.
Step 2: Choose the Right Materials for Minnesota
Not all pavers are created equal, and Minnesota's climate is one of the harshest tests a hardscape material can face. The Twin Cities metro averages 50+ freeze-thaw cycles per year. Water seeps into paver surfaces and joints, freezes, expands, thaws, and repeats -- dozens of times between November and April. Materials that are not engineered for this cycle will crack, spall, and deteriorate within a few years.
Concrete Pavers
We install County Materials pavers on most of our projects. Their Grand Discover line is our most popular choice for Lake Minnetonka patios -- it offers a natural stone look with the consistency and durability of engineered concrete. County Materials pavers are manufactured in Wisconsin specifically for Upper Midwest freeze-thaw conditions and carry a lifetime structural warranty. Other paver brands we work with include Belgard and Techo-Bloc, depending on the style and texture the homeowner wants.
Natural Stone
Flagstone, bluestone, and natural limestone create a distinctive look that no manufactured paver can replicate. Natural stone patios cost more per square foot and require more skilled installation -- each piece is unique in size, thickness, and shape. But for homeowners who want a truly one-of-a-kind patio, the investment is worth it. We select stone from regional quarries rated for Minnesota's climate to ensure long-term durability.
Permeable Pavers
Permeable paver systems allow rainwater to drain through the patio surface into a stone reservoir base below, reducing runoff and managing stormwater on-site. This is increasingly valuable for lakefront properties where the Minnehaha Creek Watershed District (MCWD) and other local authorities limit impervious surface area. A permeable patio can sometimes allow you to build a larger patio than zoning would otherwise permit, because it does not count the same as impervious coverage.
Step 3: Plan the Design Before the Build
One of the most expensive mistakes in patio construction is changing your mind after the base is poured. Excavation is done, aggregate is placed and compacted, and then the homeowner realizes the patio is too small, the shape does not work with their yard, or the paver color clashes with the house. At that point, changes mean tearing out work that was done correctly -- and paying for it twice.
This is why we build every patio project in 3D before we build it in your backyard. Our high-definition 3D renderings show the finished patio with your specific paver colors, pattern layouts, border treatments, and surrounding landscape elements. You can see how the patio relates to your house, your yard, your trees, and your views. You can try different paver colors. You can adjust the size and shape. You can add or remove features -- a fire pit pad, a seat wall, a built-in grill station -- without any construction cost.
The design phase is also where we plan integrated features that are much easier to install during initial construction:
- Landscape lighting: Conduit and wire runs for landscape lighting are laid during base construction, before pavers go down. Adding lighting after the patio is built means cutting into finished work.
- Outdoor kitchen utilities: Gas lines, water supply, electrical, and drainage for outdoor kitchens need to be roughed in before the patio surface is installed.
- Seat walls and fire features: The footings for seat walls and fire pits are built as part of the base, not on top of the finished patio surface.
- Drainage integration: Drain tile, catch basins, and grading corrections are built into the base layer -- invisible once the patio is finished, but critical to its long-term performance.
Step 4: Understand the Realistic Timeline
Here is how a typical Lake Minnetonka paver patio project moves from first contact to finished outdoor space in 2026:
April-May: Consultation and Design
You schedule a free on-site consultation. We visit your property, evaluate soil and drainage conditions, discuss your goals and budget, and take measurements. Within one week, we deliver a detailed proposal with a 3D rendering and itemized pricing. Revisions to the design typically take another one to two weeks. Most homeowners who start this process in April or early May have an approved design and signed contract by late May.
June-August: Prime Construction Season
This is when the majority of patio installations happen in Minnesota. The ground is dry, temperatures are warm, and days are long enough for full workdays. A standard paver patio (400-600 square feet) takes 3-5 days of on-site construction. Larger projects with retaining walls, outdoor kitchens, lighting, and plantings can take 2-4 weeks. Crews are at full capacity during this window, so projects are scheduled in the order contracts are signed -- another reason to start the design process now.
September-October: Late Season Window
Patio installations can extend into October in most years, but the window narrows as fall progresses. Shorter days, cooler temperatures, and the risk of early frost make late-season work less predictable. Joint sand (polymeric sand) requires dry conditions and temperatures above 40 degrees to cure properly. If you are planning a large project, starting the design in spring gives you the best chance of completing construction before the season closes.
What About Winter?
Paver patio construction is not feasible during Minnesota winters. Frozen ground cannot be properly excavated or compacted, and base materials do not compact correctly when temperatures are below freezing. Any contractor who tells you they can install a patio in January is building on a foundation that will fail.
What Does a Paver Patio Cost in the Lake Minnetonka Area?
Patio costs vary widely based on size, materials, site conditions, and integrated features. For the Lake Minnetonka area specifically -- where clay soils, drainage requirements, and lot conditions tend to increase base preparation needs -- here are realistic ranges from our completed projects:
- Standard paver patio (400-600 sq ft): $18,000-$35,000
- Large patio with borders and pattern work (600-1,000 sq ft): $35,000-$65,000
- Multi-level patio with retaining walls and steps: $55,000-$112,000
- Full outdoor living space (patio + kitchen + fire feature + lighting): $85,000-$150,000+
The wide ranges reflect the reality that no two properties are the same. A flat lot with sandy soil in Plymouth requires a fraction of the base engineering needed for a sloped lakefront lot with clay soil in Excelsior. We provide detailed, itemized quotes so you can see exactly where your money goes -- and make informed decisions about where to invest and where to save.
5 Mistakes That Cost Lake Minnetonka Homeowners Money
1. Skipping the Soil Evaluation
Building a patio without understanding your soil type is like building a house without testing the foundation site. Clay soils, high water tables, and poor drainage are common in the Lake Minnetonka area, and they all require specific base construction approaches. A contractor who quotes the same base depth for every property is either inexperienced or cutting corners.
2. Choosing Materials Based on Price Alone
The cheapest paver is not the cheapest patio over a 20-year lifespan. Low-grade pavers that crack after a few Minnesota winters need to be replaced -- and replacing pavers in a finished patio means pulling up surrounding units, re-compacting the base, and re-sanding joints. Invest in materials rated for freeze-thaw cycles and you avoid the replacement cycle entirely.
3. Ignoring Drainage Until It Becomes a Problem
Water that pools on or under a patio causes base erosion, settling, and frost heave. Drainage needs to be engineered into the base during construction, not patched in after the first spring when water pools against your foundation. This is the most common -- and most expensive -- oversight we see on patios built by other contractors.
4. Building Too Small
A 10x10 patio holds a small table and two chairs. That is it. Most homeowners underestimate the square footage they need for the way they actually use their outdoor space. A dining table for six people needs at least 12x14 feet of patio space, plus room to push chairs back. Add a grill station and you need another 6x8 feet. A fire pit seating area needs at least 14x14 feet. We use 3D renderings to show you exactly how furniture, cooking equipment, and traffic flow fit within the proposed patio footprint -- so you build the right size the first time.
5. Waiting Too Long to Start
Every contractor in the Lake Minnetonka area is fully booked by mid-June. Homeowners who call in July looking for an August installation are typically looking at September or October at the earliest -- and late-season installations carry more weather risk. Starting the design process in April or May gives you the best selection of construction dates and the highest likelihood of completing your project during peak season.
Start Your Patio Project This Spring
The planning window is open right now. Late April and May are the best time to schedule your free on-site consultation, finalize your design with a 3D rendering, and lock in a construction date for the 2026 season. Every week you wait moves your project further into the summer schedule -- and closer to the weather risks of late fall.
Whether you are envisioning a simple backyard patio in Minnetonka or a full outdoor living space with a kitchen, fire pit, and lighting on a lakefront lot in Wayzata, the process starts with a conversation about your property, your goals, and your budget.