Well-designed landscape lighting transforms how you use your outdoor space, but the wrong approach wastes money on fixtures that create glare, wash out your views, or fail within a few Minnesota winters. This guide covers the lighting types, placement strategies, fixture quality standards, and realistic costs that Lake Minnetonka homeowners should understand before investing in a system.
May is when most homeowners start thinking about outdoor lighting. The days are getting longer, the patios and decks are cleaned off, and the first warm evenings of the year make it obvious how dark and underused the backyard becomes after sunset. The good news is that a professional landscape lighting system is one of the highest-return outdoor improvements you can make -- it extends your usable hours, improves safety, increases property value, and makes every other landscape investment you have made look dramatically better after dark.
Why Low-Voltage LED Is the Only System Worth Installing
Every professional landscape lighting system we install uses low-voltage LED technology. There are important reasons for this, and understanding them will help you evaluate any proposal you receive.
Safety
Low-voltage systems operate at 12 volts, compared to the 120 volts that power your home's outlets. If a wire is accidentally cut by a shovel, lawn mower, or edger, there is no shock hazard. This matters in Minnesota, where freeze-thaw cycles can shift soil and expose buried wiring over time. A transformer steps household current down to 12 volts before it reaches any outdoor fixture, and the entire system is safe to work around without an electrician.
Energy Efficiency
Modern LED fixtures use 75-80% less electricity than the halogen bulbs that dominated landscape lighting a decade ago. A typical whole-property lighting system with 30-50 fixtures runs on a single 600-watt transformer -- roughly the same draw as a few standard light bulbs running inside your house. Annual operating costs for a full LED landscape lighting system are typically $50-$100, depending on your nightly run time.
Longevity in Minnesota's Climate
Quality LED fixtures are rated for 50,000+ hours of use -- roughly 15-20 years at typical run times. More importantly for Lake Minnetonka properties, the best fixtures are built from solid brass, copper, or marine-grade aluminum that withstand the corrosive effects of lake moisture, road salt, freeze-thaw cycling, and wet clay soil. Cheap zinc or stamped-aluminum fixtures from home improvement stores corrode within 2-3 seasons in Minnesota conditions, which is why fixture quality is one of the most important decisions in any lighting project.
The 5 Types of Landscape Lighting Every Property Needs
A complete landscape lighting design uses multiple fixture types working together. Each serves a different purpose, and the balance between them is what separates a professional installation from a DIY attempt that creates hot spots and dark gaps.
1. Path Lighting
Path lights are the most visible fixtures in any landscape lighting system. They illuminate walkways, steps, driveways, and transitions between outdoor zones. Proper path lighting is not about flooding the ground with light -- it is about creating pools of soft illumination that guide people safely from one area to the next. Fixtures are typically spaced 8-10 feet apart, staggered on alternating sides of the path, and placed 12-18 inches from the edge of the walking surface.
For Lake Minnetonka lakefront properties, path lighting is especially important on the sloped grades between the house and the water. Many of our shoreline restoration and retaining wall projects include integrated step lights and path fixtures that make steep terrain safe to navigate after dark.
2. Uplighting and Accent Lighting
Uplights are recessed or stake-mounted fixtures aimed upward at trees, architectural features, stone walls, and columns. This is the technique that creates the dramatic look most homeowners associate with professional landscape lighting. A single well-placed uplight beneath a mature oak or maple tree can transform the entire feel of a backyard.
The key is restraint. One or two carefully positioned uplights per tree create depth and texture. Five uplights around the same tree create an airport runway. Professional lighting designers use different beam widths -- narrow spots for tall trees, wider floods for spreading canopies -- to match the fixture to the subject.
3. Downlighting (Moonlighting)
Downlights are mounted high in trees or on structures, aimed downward to simulate the effect of moonlight filtering through branches. This creates soft, dappled shadows on the ground below -- a far more natural look than lighting everything from ground level. Moonlighting works particularly well over paver patios, dining areas, and gathering spaces where you want ambient light without visible fixtures.
On Lake Minnetonka waterfront properties, downlighting from trees near the shore creates a beautiful interaction with the water without the harsh glare of fixtures aimed directly at the lake surface.
4. Hardscape and Step Lighting
Small, low-profile fixtures built directly into retaining walls, seat walls, stair risers, and columns. These provide functional safety lighting on vertical surfaces and transitions. We install hardscape lights during wall and patio construction, because retrofitting them after the fact means cutting into finished masonry or stone work.
Our Excelsior lakeside renovation included over 50 hardscape and step lights integrated across three tiers of retaining walls and 23 stairs -- all wired during construction with conduit concealed inside the wall system. This type of integration is only possible when lighting is planned as part of the landscape design, not added later.
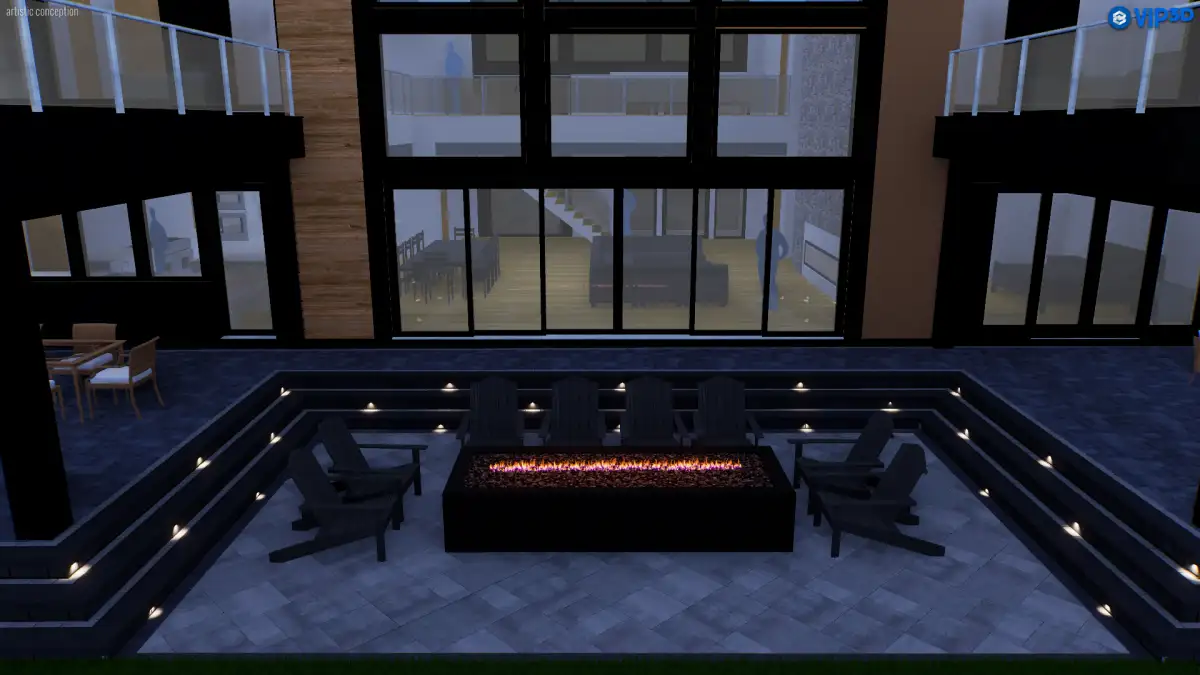
5. Outdoor Living Area Lighting
Dedicated lighting for outdoor kitchens, fire feature seating areas, dining spaces, and entertaining zones. This category includes under-counter task lighting for grills and prep areas, soffit lights for covered structures, and ambient sconces or pendants for dining areas. The goal is functional light levels that let you cook, eat, and entertain comfortably without over-lighting the space.
Planning Your System: What to Consider Before Installation
Start With a Lighting Design, Not a Fixture List
The most common mistake homeowners make is buying fixtures first and then trying to figure out where to put them. A lighting design starts with your property -- the architectural features of your home, the mature trees worth highlighting, the pathways that need safe illumination, the outdoor living areas that need functional light, and the views you want to preserve (including views of the lake, if you have them).
We create lighting plans as part of our 3D landscape design process. You see exactly how each fixture will illuminate your property at night before any installation begins. This prevents the two most expensive mistakes: buying too many fixtures (over-lighting) and placing them in positions that create glare or light pollution.
Fixture Quality Matters More Than Fixture Count
A system with 20 high-quality brass fixtures will outlast and outperform a system with 40 cheap zinc fixtures. In the Lake Minnetonka area, where soil moisture is high, lake humidity is constant, and road salt spray reaches properties near major roads, fixture material is the single biggest factor in system longevity.
Here is what to look for in quality fixtures:
- Body material: Solid brass, copper, or cast aluminum (not stamped aluminum or zinc die-cast)
- LED module: Integrated, not screw-in bulbs. Integrated modules are sealed against moisture and rated for 50,000+ hours
- Color temperature: 2700K (warm white) for residential landscapes. Anything above 3000K looks cold and institutional
- IP rating: IP65 or higher for fixtures that will be buried in soil or exposed to direct rain
- Warranty: Lifetime warranty on the fixture body, minimum 5-year warranty on LED components
Transformer Sizing and Placement
The transformer is the heart of the system. It converts your home's 120-volt power to the 12-volt current that runs the entire lighting network. Proper transformer sizing accounts for total wattage of all fixtures plus a 20% capacity buffer for future additions. A system with 25 fixtures at 5 watts each (125 watts total) needs at minimum a 150-watt transformer, though we typically install a 300-watt unit to allow room for future expansion without replacing the transformer.
Transformers should be mounted in a concealed, ventilated location -- typically near the electrical panel on the exterior of the house, behind shrubs, or inside a dedicated utility enclosure. They include built-in timers and photocells that automate on/off scheduling based on sunset times.
Wiring and Zones
Professional installations use multiple wiring runs (zones) rather than daisy-chaining all fixtures on a single cable. Zones allow you to control different areas independently -- path lights on a dusk-to-dawn schedule, accent lights on a timer that shuts off at midnight, and outdoor living area lights on a manual switch for when you are entertaining. Zoning also prevents voltage drop across long wire runs, which causes fixtures far from the transformer to appear dimmer than those close to it.
All wiring is buried 6-8 inches deep in Minnesota to protect against freeze damage and accidental disturbance. Connections use waterproof, gel-filled wire nuts -- not the cheap twist connectors that corrode underground within one season.
What Does Landscape Lighting Cost in the Lake Minnetonka Area?
Costs depend on the number of fixtures, fixture quality, property size, and installation complexity. Here are realistic ranges from our completed projects in Minnetonka, Shorewood, Wayzata, and surrounding communities:
- Entry-level system (10-15 fixtures, path + accent lighting): $4,500-$8,000
- Mid-range system (20-30 fixtures, paths + trees + hardscape): $8,000-$16,000
- Comprehensive system (35-50+ fixtures, full property coverage): $16,000-$30,000
- Integrated with hardscape project (lighting + patio/walls): Varies, but 15-25% savings vs. standalone installation
The most cost-effective approach is designing lighting alongside a new patio, retaining wall, or outdoor living space project. When we are already excavating for a patio base or building wall foundations, adding conduit and wiring adds minimal labor cost. Running those same wires under an existing finished patio means cutting into completed work -- or routing cables around it in a less optimal path.
When to Install: Timing for the 2026 Season
Landscape lighting can be installed throughout the Minnesota construction season, from mid-May through October. However, the ideal timing depends on your situation:
- Standalone lighting project: May through September. Wire burial requires unfrozen, workable soil. Most standalone lighting installations take 1-2 days for a typical residential system.
- Integrated with hardscape construction: Plan the lighting design now, install during the hardscape build (typically June through September). Wiring is placed during base preparation, before pavers or wall blocks go down.
- Adding to an existing landscape: Early season (May-June) is best, before plantings are fully leafed out and garden beds are at peak growth. Less disruption to established plants.
Homeowners who schedule their lighting consultation in May typically have their system installed and running by early to mid-June -- well before the July 4th holiday weekend, which is often the first big outdoor entertaining event of the summer.
4 Common Landscape Lighting Mistakes
1. Over-Lighting the Property
More fixtures does not mean better lighting. The most elegant lighting designs use the minimum number of fixtures needed to create the desired effect. Dark areas between lit zones create depth and visual interest. A property where every square foot is illuminated looks like a commercial parking lot, not a home.
2. Choosing Cool White Color Temperature
Fixtures rated at 4000K or higher produce a bluish-white light that looks harsh and institutional in a residential setting. Warm white (2700K) is the standard for residential landscape lighting because it complements natural materials -- stone, wood, brick, and foliage all look better under warm light. The exception is underwater lighting for pools or water features, where cooler temperatures (3000K) can work well.
3. Ignoring Glare Control
An improperly aimed uplight or path light that shines directly into eyes is worse than no light at all. Every fixture should be positioned and shielded so that you see the effect of the light -- the illuminated tree, the lit pathway, the highlighted wall -- without seeing the light source itself. This is especially important on lakefront properties in Orono, Wayzata, and Deephaven, where lighting aimed toward the water can create glare off the lake surface.
4. Buying Big-Box Store Fixtures
Hardware store landscape lighting kits are designed for price, not performance. The fixtures are made from materials that corrode in 2-3 Minnesota seasons, the LED modules cannot be replaced, and the wire connectors fail underground within a year. Replacing a failed $15 fixture is not expensive -- but digging up the wiring, replacing corroded connections, and reinstalling a new fixture every two years quickly exceeds what a professional system would have cost upfront.
Get the Most Out of Your Outdoor Space This Summer
The difference between a property that gets used after sunset and one that does not is almost always lighting. A well-designed system does not just illuminate your landscape -- it extends your usable outdoor hours by three to four months every year, from the first warm evenings in May through the last comfortable nights in October.
If you are planning a new patio, retaining wall, or outdoor living project this season, now is the time to incorporate lighting into the design. And if your property already has the hardscape but lacks the lighting, a standalone installation before summer is one of the fastest ways to transform how you experience your outdoor space.